
Mango Cheesecake Cocktail: Sweet, Tangy, and Cheesy Drink
December 13, 2025
Mozzarella Grilled Veggies: Healthy and Cheesy Side Dish
December 14, 2025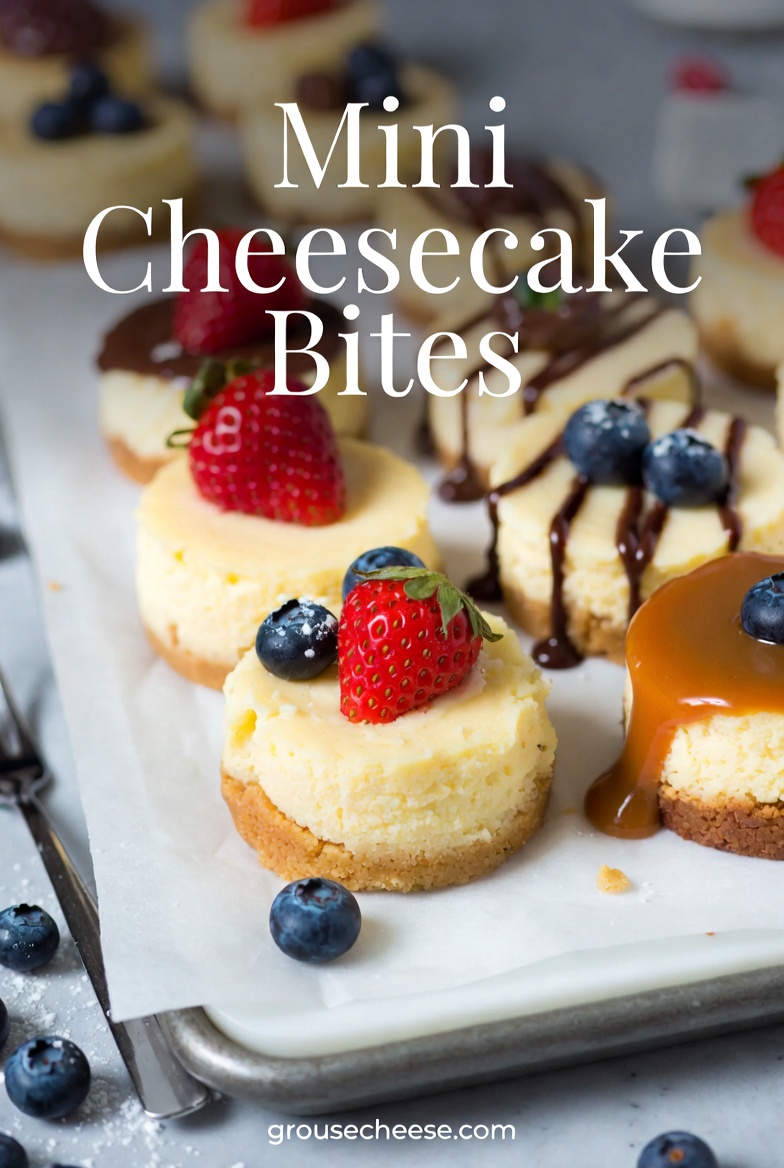
There is something undeniably magical about a dessert you can hold in one hand. While a traditional New York-style cheesecake is a showstopper, it often requires a serious time commitment, a finicky water bath, and the daunting task of slicing it perfectly. Enter mini cheesecake bites. These adorable, individual portions offer all the creamy, tangy decadence of their larger counterparts but with half the effort and double the fun.
If you are looking for the ultimate crowd-pleaser for your next party, or just a simple sweet treat to keep in the fridge for late-night cravings, you have arrived at the right place. In this guide, we will explore why these tiny desserts are taking over dessert tables everywhere. You will learn the secrets to the perfect crust, how to achieve a crack-free filling without a water bath, and explore endless flavor variations. By the end, you’ll be ready to whip up a batch of mini cheesecake bites that look as good as they taste.
Why We Love Mini Desserts
The popularity of miniature desserts isn’t just a passing trend; it’s a practical evolution of how we enjoy sweets. Mini cheesecake bites solve several problems inherent to standard baking. First, there is the matter of portion control. A full slice of cheesecake can be heavy, but a two-bite treat feels manageable and guilt-free. You can satisfy your sweet tooth without feeling weighed down.
Second, they are incredibly versatile for social gatherings. At a potluck or a buffet, guests often hesitate to cut into a pristine whole cake. Individual servings remove that barrier. Everyone can grab a cheesecake bite and mingle. Plus, the shorter baking and cooling times mean you aren’t held hostage by your oven for hours. You get instant gratification much faster than with a standard 9-inch springform pan.
Essential Tools and Ingredients
Before you preheat your oven, let’s talk about what makes mini cheesecake bites successful. The beauty of this recipe lies in its simplicity, but the quality of your tools and ingredients matters.
The Equipment
You don’t need fancy gadgets, but a few specific items will make your life easier:
- Mini Muffin Tin: This is non-negotiable. A standard 24-count mini muffin pan creates the perfect bite-sized ratio of crust to filling.
- Paper Liners: Always use liners. They make removal a breeze and cleanup instant.
- A Shot Glass or Tart Tamper: You need something with a flat bottom to press the crust firmly into the liners. A standard shot glass usually fits perfectly into a mini muffin tin.
- Electric Mixer: Whether hand-held or a stand mixer, you need power to get the cream cheese perfectly smooth.
The Ingredients
- Cream Cheese: Use full-fat, brick-style cream cheese. The tub varieties have too much air and water content, which can prevent your bites from setting properly.
- Eggs: These provide structure.
- Sugar: Standard granulated sugar works best.
- Sour Cream or Heavy Cream: A touch of this adds that luxurious, silky texture we all crave.
- Vanilla Extract: High-quality vanilla elevates the flavor from “okay” to bakery-level.
How to Make Perfect Mini Cheesecake Bites
Making these treats is a straightforward process, but following the correct technique ensures they come out smooth and creamy every time.
Step 1: Preparing the Crust
The foundation of any good cheesecake is the crust. For mini cheesecake bites, a graham cracker crust is traditional, but don’t feel limited. You can use digestive biscuits, vanilla wafers, or even Oreos for a chocolate twist.
Pulse your crackers into fine crumbs and mix them with melted butter and a pinch of sugar. The texture should resemble wet sand. Place a small spoonful—about a teaspoon—into each lined muffin cup. This is where your shot glass comes in handy. Press down firmly to create a solid base. Pre-baking the crust for about 5 minutes helps it stay crunchy under the filling, though some bakers skip this step for a softer base.
Step 2: Mixing the Batter
This is the most critical step. Room temperature ingredients are mandatory. If your cream cheese is cold, it will remain lumpy no matter how much you beat it. If your eggs are cold, they will shock the batter and cause separation.
Beat the softened cream cheese until it is completely smooth and creamy. Scrape down the bowl frequently. Add sugar and mix until combined. Then, add your eggs one at a time, mixing on low speed. Do not overmix at this stage. Overmixing incorporates too much air, which causes the cheesecakes to puff up rapidly in the oven and then collapse and crack as they cool.
Step 3: Baking Without a Water Bath
One of the best things about mini cheesecake bites is that you generally do not need a water bath. Because they are so small, they cook through evenly before the edges have a chance to dry out or burn.
Fill your muffin cups almost to the top. Bake at a moderate temperature, usually around 325°F (163°C), for 15 to 18 minutes. You are looking for the centers to be slightly set but still have a little “wobble” to them. They will continue to firm up as they cool. If they look completely solid in the oven, they might be overbaked.
Step 4: Cooling and Chilling
Patience is a virtue here. Let the bites cool in the pan at room temperature. If you move them to the fridge too quickly, the drastic temperature change can cause condensation to form, making the crust soggy. Once they are at room temperature, chill them in the refrigerator for at least 2 hours to achieve that dense, fudgy cheesecake texture.
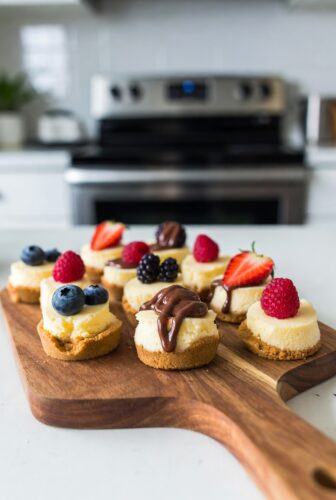
Creative Flavor Variations
Once you master the vanilla base, the world is your oyster. Mini cheesecake bites are a blank canvas for creativity. Here are a few variations to spice up your dessert platter.
The Chocolate Lover
Swap the graham cracker crust for crushed Oreo cookies. Add a ¼ cup of high-quality cocoa powder or melted chocolate to the batter. Top with chocolate ganache and a raspberry for a rich, elegant finish.
Lemon Blueberry
Add a tablespoon of fresh lemon zest and a teaspoon of lemon juice to the batter. Before baking, gently press two or three fresh blueberries into the center of each bite. The berries burst during baking, creating pockets of jammy sweetness.
Salted Caramel Pecan
Stick to the classic vanilla recipe. Once cooled, top each bite with a teaspoon of thick salted caramel sauce and a toasted pecan half. The combination of creamy, salty, and crunchy is irresistible.
Holiday Pumpkin
For autumn gatherings, replace a portion of the cream cheese with pumpkin puree and add pumpkin pie spice. These orange-hued bites look festive and taste like fall.
Strawberry Swirl
Puree fresh strawberries and strain out the seeds. Drop small dots of the puree onto the unbaked batter and swirl with a toothpick. This creates a beautiful marbled effect that looks professional but takes seconds to do.
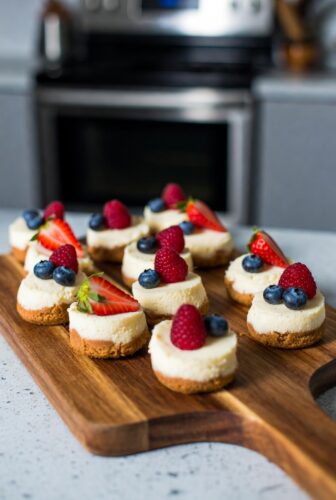
Serving and Presentation Ideas
Presentation transforms simple home baking into an event. Because mini cheesecake bites are small, you can arrange them in stunning patterns on platters.
- Tiered Stands: Use a cupcake stand to display different flavors on different levels.
- Garnish Games: Fresh mint leaves, edible flowers, or chocolate shavings make a huge visual impact.
- Topping Bar: If you are hosting a party, serve the cheesecakes “naked” and set up a topping bar. Bowls of fruit compote, chocolate chips, whipped cream, and caramel allow guests to customize their own dessert.
Storage and Freezing Tips
If you manage not to eat them all in one sitting, these treats store beautifully. In fact, many bakers agree that cheesecake tastes better the next day after the flavors have had time to meld.
In the Fridge: Store your bites in an airtight container. They will stay fresh for up to 5 days. If you have topped them with fresh fruit or whipped cream, they are best consumed within 2 days.
In the Freezer: Mini cheesecake bites are one of the best desserts to freeze. Place the cooled, uncoated bites on a baking sheet and freeze until solid (flash freezing). Once hard, transfer them to a heavy-duty freezer bag. They will keep for up to 3 months. To serve, simply thaw them in the refrigerator overnight or on the counter for 30 minutes. Do not freeze them with toppings like fresh fruit or whipped cream, as these textures do not hold up well after thawing.
Frequently Asked Questions (FAQs)
Q: Do I really need to use room temperature ingredients?
A: Yes, absolutely. Cold cream cheese is the number one cause of lumpy batter. Room temperature ingredients blend together smoothly, ensuring a silky, uniform texture for your mini cheesecake bites.
Q: Why did my mini cheesecakes sink in the middle?
A: Sinking usually happens because of overmixing. When you whip too much air into the eggs, the cheesecakes puff up like soufflés in the oven and then collapse when the air escapes during cooling. Mix on low speed and stop as soon as the ingredients are combined.
Q: Can I use a regular muffin tin instead of a mini one?
A: You certainly can. You will get fewer, larger cheesecakes (usually about 12 instead of 24). You will need to increase the baking time to approximately 20-25 minutes. Keep an eye on them and look for that slight wobble in the center.
Q: How do I get them out of the pan without breaking them?
A: Using paper liners is the safest method. If you didn’t use liners, you must ensure the pan was greased very well. Run a thin knife around the edge of each cheesecake only after they are completely chilled and firm.
Q: Can I make these gluten-free?
A: Yes. The filling is naturally gluten-free (check your vanilla extract to be sure). For the crust, simply swap regular graham crackers or cookies for a gluten-free alternative. The ratios of butter to crumbs generally remain the same.
Q: Why are my cheesecakes grainy?
A: Graininess can occur if the sugar wasn’t fully dissolved into the cream cheese before adding eggs, or if the cheese was overcooked. To avoid this, mix the sugar and cream cheese thoroughly at the beginning, and be careful not to overbake.
Final Words
Baking doesn’t always have to be a grand production involving water baths and hours of waiting. Mini cheesecake bites prove that you can achieve gourmet results with minimal fuss. They are the perfect canvas for your culinary creativity, allowing you to experiment with flavors, crusts, and toppings without committing to a massive cake.
Whether you are prepping for a holiday party, a summer barbecue, or just a Tuesday night treat, these little gems deliver joy in every bite. So, grab your muffin tin, soften that cream cheese, and get ready to bake the most popular dessert you’ve ever served. The only difficult part will be eating just one.