
Raspberry Swirl Cheesecake: Sweet, Tart, and Beautiful Dessert
January 22, 2026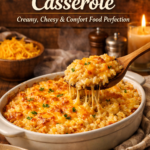
Cheddar Rice Casserole: Easy and Delicious Baked Dish
January 24, 2026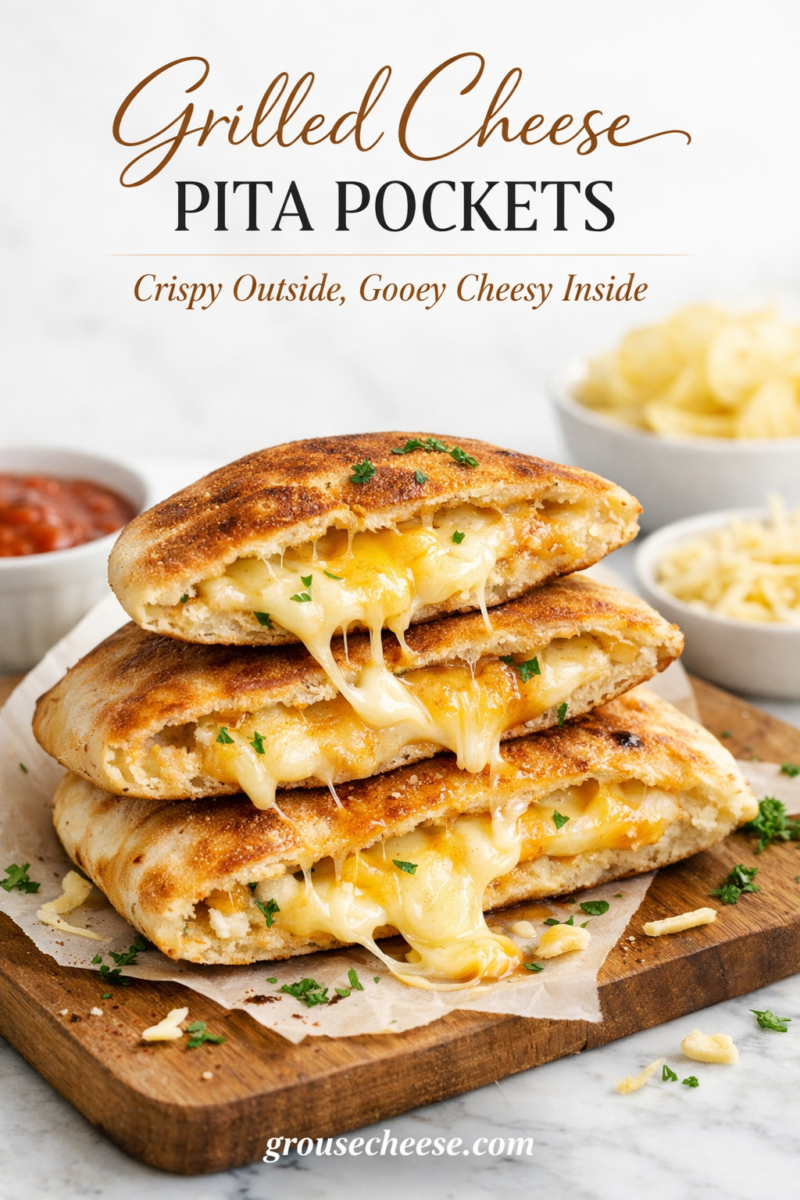
If there is one comfort food that reigns supreme, it is undoubtedly the grilled cheese sandwich. It is warm, gooey, and universally loved. But what happens when you swap the traditional sandwich bread for something a little more robust and pocket-friendly? You get Grilled Cheese Pita Pockets. This twist on the classic elevates the humble cheese sandwich into a self-contained, mess-free meal that is perfect for lunches, dinners, or even a hearty snack.
Unlike standard bread, which can sometimes get soggy or let the cheese leak out, a pita pocket holds everything securely inside. This means you can stuff it fuller, experiment with more ingredients, and enjoy a crispier exterior without sacrificing that essential molten cheese core.
In this guide, we will explore why this version of grilled cheese is a game-changer. We will cover the delightful textures, provide a foolproof step-by-step recipe, offer tips to get that perfect golden crust, and share creative variations to keep your taste buds excited. Whether you are cooking for picky eaters or looking for a quick gourmet fix, these pita pockets are the answer.
Why We Love Grilled Cheese Pita Pockets
The magic of Grilled Cheese Pita Pockets lies in their construction. Traditional grilled cheese is often a balancing act—flipping it at the right moment so the bread doesn’t burn before the cheese melts, all while hoping the filling stays put. Pita bread solves this architectural problem effortlessly.
Flavor Profile: Toasty and Rich
The flavor profile is familiar yet distinct. You still get the rich, savory notes of melted cheese—whether it’s sharp cheddar, creamy mozzarella, or nutty gruyère. However, the pita bread adds a unique dimension. It is slightly nuttier and denser than white bread. When grilled or pan-fried, the pita develops a deep, toasted flavor that pairs beautifully with savory fillings. The use of butter or olive oil on the outside adds a salty, savory finish that hits your palate first.
Texture: The Perfect Crunch
Texture is where the pita pocket truly shines. Standard bread can sometimes become overly greasy or soft. A pita, however, is designed to be durable. When cooked properly, the exterior becomes incredibly crispy and audibly crunchy, similar to a thin-crust pizza or a well-toasted panini. Inside, the bread remains soft and pillowy, absorbing just enough of the melted cheese oils to become tender without falling apart. The contrast between the shattering crispness of the outer shell and the gooey, soft interior is immensely satisfying.
Versatility: A Blank Canvas
Perhaps the best feature is versatility. Because it is a pocket, you are not limited to just cheese. You can stuff these pockets with vegetables, deli meats, sauces, and herbs without worrying about the structural integrity of your sandwich. They are sturdy enough to be dipped in tomato soup, marinara sauce, or hummus, making them a fun and interactive meal.
How to Make Grilled Cheese Pita Pockets at Home
Creating the perfect grilled cheese pita pocket is simple, but a few key steps ensure you get the best result every time. This recipe serves two, but you can easily scale it up.
Ingredients
- Pita Bread: 2 whole wheat or white pita rounds (the kind that forms a pocket).
- Cheese: 1 ½ cups shredded cheese (a mix of Cheddar and Mozzarella works best for flavor and stretch).
- Fat: 2 tablespoons unsalted butter (room temperature) or olive oil.
- Seasoning: A pinch of garlic powder and dried oregano (optional).
- Extras: Thinly sliced tomato or cooked bacon (optional).
Step-by-Step Instructions
Step 1: Prep the Pita
If your pita bread is fresh, cut it in half to create two semi-circles. Gently open the pocket with a knife or your fingers. If the pita is a bit dry, pop it in the microwave for 10 seconds to make it pliable so it doesn’t crack when you open it.
Step 2: Mix the Cheese
In a bowl, toss your shredded cheeses together. Using shredded cheese instead of slices ensures it melts faster and more evenly inside the pocket. If you are adding herbs or spices like garlic powder, mix them into the cheese now.
Step 3: Stuff the Pockets
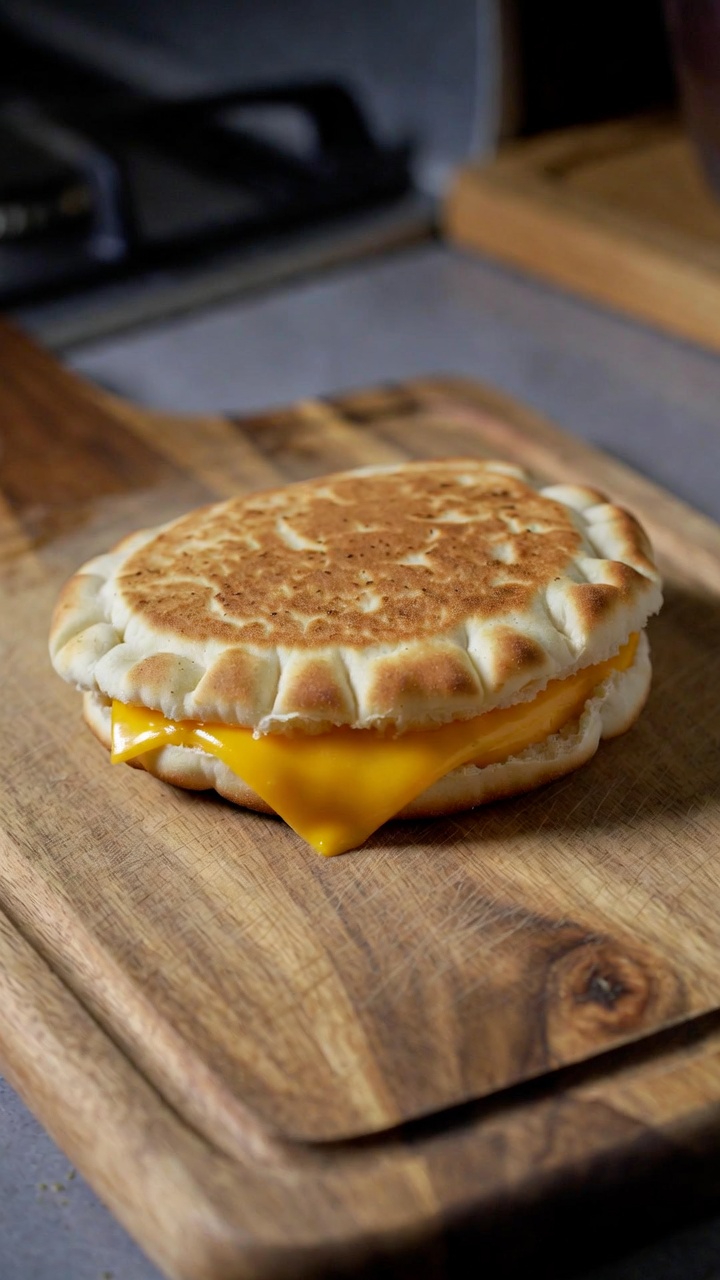
Take a handful of the cheese mixture and stuff it into each pita half. Be generous but don’t overstuff to the point of tearing the bread. If adding extras like tomato or bacon, layer them in the middle of the cheese so the melting cheese acts as glue on both sides.
Step 4: Butter the Exterior
Spread the room temperature butter evenly over the outside of the pita pockets on both sides. If you prefer olive oil, brush it on. This is crucial for that golden-brown crust.
Step 5: Grill to Perfection
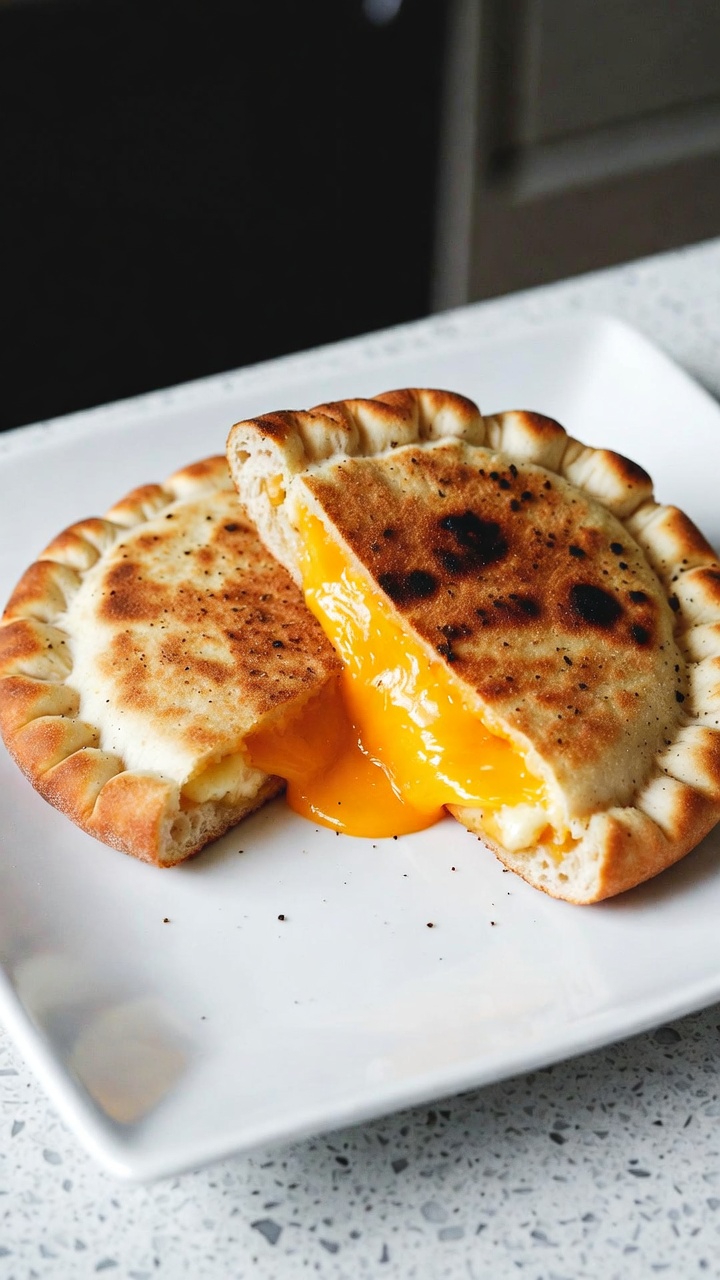
Heat a non-stick skillet or a grill pan over medium heat. Place the stuffed pita pockets in the pan. Cook for 3-4 minutes on one side. You want a deep golden brown color. Flip carefully and cook for another 3-4 minutes on the other side.
Step 6: Melt and Serve
If the bread is browning too fast but the cheese isn’t fully melted, lower the heat and cover the pan with a lid for a minute. This traps the steam and helps the cheese melt without burning the bread. Remove from the pan, let them sit for a minute (that cheese is hot!), and enjoy.
Tips for the Perfect Crust and Melt
Even a simple recipe benefits from technique. Here is how to troubleshoot common issues and ensure your Grilled Cheese Pita Pockets are restaurant-quality.
Shred Your Own Cheese
Pre-shredded cheese from the grocery store is coated in anti-caking agents like potato starch or cellulose. This prevents the cheese from melting smoothly and can result in a grainy texture. For the best “cheese pull,” buy a block of cheese and grate it yourself.
Control the Heat
Pita bread is thinner than sliced loaf bread, meaning the heat travels through it quickly. However, it can also burn rapidly. Keep your heat at medium or medium-low. Patience is key. If the pan is smoking, it’s too hot. Low and slow ensures the heat penetrates to the center of the pocket.
Press it Down
To get maximum contact with the hot pan, use a spatula to gently press down on the pita while it cooks. If you have a cast-iron bacon press or even a heavy lid, place it on top. This mimics a panini press and creates an ultra-crispy, compressed exterior.
The Mayo Trick
If you want an even crispier, tangier crust, try swapping butter for mayonnaise on the outside of the pita. Mayo has a higher smoke point than butter and spreads easily, creating a uniformly browned surface that is delicious.
Creative Serving Ideas and Variations
Once you have mastered the basic recipe, it is time to get creative. The sturdy nature of pita pockets invites experimentation.
The Greek Pocket
Lean into the origins of the pita. Use a mix of mozzarella and crumbled feta cheese. Add sliced Kalamata olives, diced roasted red peppers, and a sprinkle of dried oregano. Serve with a side of tzatziki sauce for dipping.
The Pizza Pocket
This is a hit with kids. Mix mozzarella with a spoonful of parmesan. Spread a thin layer of marinara sauce inside the pita (not too much, or it will get soggy) and add mini pepperoni slices. It’s a faster, healthier alternative to frozen pizza snacks.
The Breakfast Pocket
Who says grilled cheese is just for lunch? Stuff your pita with scrambled eggs, cheddar cheese, and a sausage patty or bacon strips. Grill it up for a portable breakfast that beats any drive-thru offering.
The Gourmet Green
For a more sophisticated take, use Gruyère or Fontina cheese. Add a handful of fresh spinach or arugula and a layer of caramelized onions. The bitterness of the greens cuts through the rich cheese beautifully.
Spicy Jalapeño Popper
Mix cream cheese with shredded cheddar and diced pickled jalapeños. Stuff this mixture into the pita. The result is a creamy, spicy explosion that tastes just like a jalapeño popper wrapped in crispy bread.
Frequently Asked Questions
Can I make these in an air fryer?
Yes! Air fryer Grilled Cheese Pita Pockets are fantastic. Preheat your air fryer to 370°F (190°C). Prepare the pockets as usual, brushing the outside with oil or butter. Cook for 4-5 minutes, flip, and cook for another 3-4 minutes. They come out exceptionally crispy.
What is the best cheese for pita pockets?
Melting cheeses are best. Cheddar, Monterey Jack, Mozzarella, Gouda, and Fontina are excellent choices. Hard cheeses like Parmesan or aged Pecorino don’t melt well on their own but are great flavor enhancers when mixed with a melting cheese.
How do I store leftovers?
These are best eaten fresh while crispy. However, if you have leftovers, store them in an airtight container in the fridge for up to 2 days. To reheat, avoid the microwave as it will make the bread chewy. Instead, reheat them in a toaster oven, air fryer, or back in a skillet until warmed through and crispy again.
Can I freeze them?
Yes, you can meal prep these. Assemble the pita pockets with cheese and fillings but do not cook them. Wrap them tightly in plastic wrap and freeze for up to a month. When ready to eat, you can cook them directly from frozen, just lower the heat and cook for longer to ensure the center thaws and melts.
Why is my pita bread tearing?
Pita bread can dry out quickly. If it tears when you try to open the pocket, it might be stale. Try wrapping the pita in a damp paper towel and microwaving it for 10-15 seconds. The steam will soften the bread, making it pliable enough to open without ripping.
Final Words
Grilled Cheese Pita Pockets are a brilliant evolution of a classic staple. They offer everything you love about a grilled cheese—the comfort, the warmth, the gooiness—but packaged in a smarter, crispier vessel. They solve the problem of messy eating while opening the door to endless culinary creativity.
Whether you stick to the classic cheddar filling or venture into gourmet combinations like feta and spinach, the result is always a satisfying, crunchy, cheesy meal. Next time you reach for the loaf of white bread, pause and grab a pack of pitas instead. Your lunch routine will thank you.