
Cheesy Spinach Artichoke Dip Recipe for Parties & Snacks
December 10, 2025
Cheesy Baked Eggs in Toast Cups: Simple Breakfast Idea
December 13, 2025
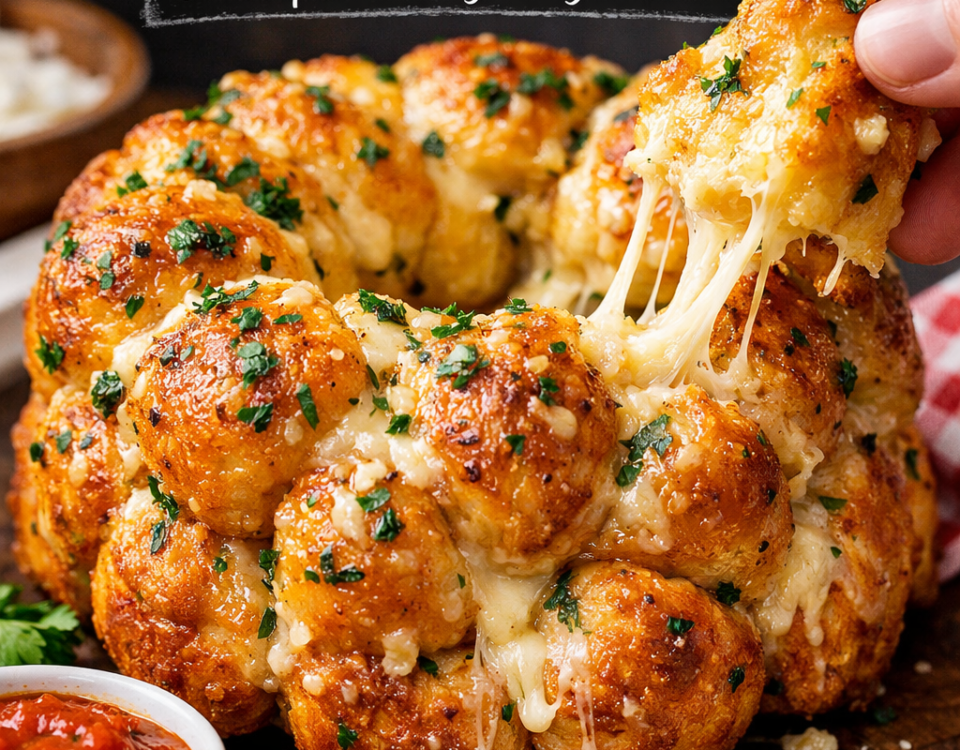
There is something universally comforting about the smell of fresh bread baking in the oven. It fills the kitchen with warmth and signals that a delicious meal is on the way. While a crusty loaf has its place, nothing quite compares to the pillowy texture of homemade rolls, especially when cheese is involved. If you have been searching for the ultimate side dish to elevate your weeknight dinners or holiday feasts, these soft cheesy dinner rolls are exactly what you need.
Bread making can sometimes feel intimidating, with all the talk of yeast, proofing times, and kneading techniques. However, this guide is designed to break down the process into simple, manageable steps. Whether you are a seasoned baker or attempting your first batch of dough, you will find everything you need here to create golden, fluffy rolls that pull apart perfectly. Let’s dive into why these rolls deserve a permanent spot in your recipe box and how you can make them tonight.
Why Homemade Rolls Beat Store-Bought Every Time

It is easy to grab a bag of rolls from the supermarket shelf. They are convenient, sure, but they often lack the depth of flavor and texture found in homemade versions. Store-bought rolls can be dry or overly preservative-heavy, whereas making your own allows you to control exactly what goes into the dough.
When you bake soft cheesy dinner rolls at home, you are using real butter, fresh milk, and high-quality cheese. The result is a roll that is tender on the inside with a slight golden crust on the outside. Plus, the customization options are endless. You can adjust the type of cheese, add herbs, or tweak the sweetness to suit your family’s preferences. Most importantly, the act of baking bread is a labor of love that your family will taste in every bite.
Essential Ingredients for Soft Cheesy Dinner Rolls
To get started, you will need a few pantry staples. The magic of this recipe lies in the balance of fat and liquid, which ensures the rolls stay soft for days.
The Dough Base
- All-Purpose Flour: This provides the right amount of protein for structure without making the rolls too tough. For an even softer texture, you can use bread flour, but all-purpose works beautifully.
- Active Dry Yeast: The powerhouse behind the rise. Make sure your yeast is fresh; if it doesn’t foam when mixed with warm liquid, it’s time to buy a new jar.
- Warm Milk: Milk adds richness and tenderizes the gluten. The ideal temperature is around 110°F (43°C)—warm to the touch but not hot.
- Sugar: A little sugar feeds the yeast and helps with browning.
- Unsalted Butter: Melted butter in the dough adds moisture and flavor.
- Egg: This acts as a binder and enriches the dough, giving it a golden color.
- Salt: Never forget the salt! It controls yeast activity and brings out the flavor of the bread.
The Cheesy Goodness
- Sharp Cheddar Cheese: For the best flavor impact, grate your own block of sharp cheddar. Pre-shredded cheese is often coated in anti-caking agents that prevent it from melting smoothly into the dough.
- Parmesan or Mozzarella: Depending on your preference, you can mix in a secondary cheese for added texture or a salty kick.
- Garlic Butter Topping: A mix of melted butter, garlic powder, and parsley brushed over the hot rolls is the finishing touch that takes these from good to unforgettable.
Step-by-Step Guide to Making the Dough

Creating the perfect soft cheesy dinner rolls starts with treating the dough right. Follow these steps for success.
1. Activate the Yeast
Begin by combining your warm milk and sugar in a large mixing bowl or the bowl of your stand mixer. Sprinkle the active dry yeast over the top and let it sit for about 5 to 10 minutes. You should see a foamy layer form on the surface. This bloom tells you the yeast is alive and ready to work.
2. Mix and Knead
Add the melted butter, egg, and salt to the yeast mixture. Whisk until combined. Gradually add the flour, one cup at a time. If you are using a stand mixer, use the dough hook attachment on low speed. If you are working by hand, stir with a wooden spoon until the dough becomes difficult to mix, then turn it out onto a floured surface.
Once the flour is incorporated, it’s time to add the star ingredient: the cheese. Gently fold in the shredded cheddar until it is evenly distributed throughout the dough. Continue kneading for about 5-7 minutes. The dough should be soft and slightly tacky, but not sticky. It should spring back when you poke it with your finger.
3. The First Rise (Proofing)
Lightly grease a clean bowl with oil or cooking spray. Place your dough ball inside, turning it once to coat it in oil. Cover the bowl with plastic wrap or a warm, damp kitchen towel. Place it in a draft-free warm spot and let it rise until it has doubled in size. This usually takes about 1 to 1.5 hours, depending on the temperature of your kitchen.
Shaping and Baking Your Rolls
Once your dough has risen beautifully, the fun part begins.
Shaping the Rolls
Punch down the dough gently to release the air bubbles. Turn it out onto a lightly floured surface. Divide the dough into 12 to 15 equal pieces. To ensure uniform baking, you can use a kitchen scale to weigh each piece, aiming for about 60-70 grams each.
Take each piece of dough and tuck the edges underneath to form a smooth ball. Roll it gently against the counter with the palm of your hand to create surface tension. This helps the rolls keep their shape as they bake.
Place the shaped rolls into a greased 9×13 inch baking pan. Leave a little space between them, as they will expand during the second rise.
The Second Rise
Cover the pan again and let the rolls rise for another 30 to 45 minutes. They should look puffy and touch each other in the pan. While they rise, preheat your oven to 375°F (190°C).
Baking to Perfection
Bake the rolls for 20-25 minutes. They are done when the tops are a deep golden brown and they sound hollow when lightly tapped. If you find the tops are browning too quickly, you can tent the pan with aluminum foil for the last few minutes of baking.
Immediately upon removing them from the oven, brush the tops generously with your garlic herb butter mixture. The heat from the rolls will help the butter soak in, keeping the crust soft and flavorful.
Tips for the Softest Texture
Achieving that cloud-like texture in soft cheesy dinner rolls requires attention to a few key details.
- Don’t Over-Flour: It is tempting to add more flour if the dough feels sticky, but too much flour creates dense, dry rolls. Trust the kneading process to develop the gluten and reduce stickiness.
- Room Temperature Ingredients: Make sure your egg is at room temperature before adding it to the dough. Cold ingredients can shock the yeast and slow down the rising process.
- Check Your Yeast: We mentioned this earlier, but it bears repeating. Dead yeast equals dense pucks of dough. If your yeast doesn’t foam, start over.
- The Windowpane Test: To know if you have kneaded enough, take a small piece of dough and stretch it thin. If you can stretch it until it’s translucent without tearing (like a windowpane), your gluten structure is ready.
Flavor Variations to Try
Once you master the basic recipe for soft cheesy dinner rolls, feel free to experiment with different flavor profiles.
Jalapeño Cheddar
For those who like a little heat, fold in diced pickled jalapeños or finely chopped fresh peppers along with the cheddar cheese. This combination is fantastic with chili or taco soup.
Garlic and Herb
Boost the savory factor by adding a teaspoon of garlic powder and dried rosemary or thyme directly into the flour mixture. Pair this with mozzarella or provolone cheese for an Italian-inspired twist.
Bacon and Swiss
Cooked, crumbled bacon adds a salty, smoky crunch that pairs wonderfully with the nutty flavor of Swiss cheese or Gruyère. These rolls are hearty enough to serve as a snack on their own.
Serving Suggestions
These rolls are incredibly versatile. Here are a few ways to incorporate them into your family meals:
- Holiday Dinners: They are the perfect accompaniment to roast turkey, ham, or prime rib.
- Soup Companion: Serve them alongside a hearty beef stew, potato soup, or tomato bisque for dipping.
- Slider Buns: Because they are so soft, these rolls make excellent slider buns for pulled pork, mini burgers, or ham and cheese sandwiches.
- Breakfast: Split leftovers in half, toast them, and slather with butter for a savory start to the day.
FAQ: Common Questions About Dinner Rolls
Can I make the dough ahead of time?
Yes! You can prepare the dough through the first rise. After shaping the rolls and placing them in the pan, cover them tightly and refrigerate overnight. About 2 hours before you plan to bake, remove them from the fridge to let them come to room temperature and finish rising.
Why are my rolls dense instead of fluffy?
Dense rolls are usually caused by three things: dead yeast, not kneading the dough enough (under-developed gluten), or adding too much flour during the mixing process. Ensure you measure flour correctly by spooning it into the measuring cup and leveling it off, rather than scooping directly from the bag.
Can I freeze these rolls?
Absolutely. You can freeze baked rolls by letting them cool completely and storing them in an airtight freezer bag for up to 3 months. To reheat, wrap them in foil and warm them in a 350°F oven for 10-15 minutes. Alternatively, you can freeze the unbaked shaped dough balls. Thaw them in the fridge overnight before letting them rise and bake.
What is the best way to store leftovers?
Store leftover rolls in an airtight container or Ziploc bag at room temperature for up to 3 days. Avoid storing them in the fridge, as the cold air can dry out the bread faster.
Can I use instant yeast instead of active dry?
Yes. If using instant yeast (also called rapid rise), you do not need to bloom it in the milk first. You can mix it directly into the flour. However, the warm milk is still necessary for the dough’s hydration. The rise times may be slightly faster with instant yeast, so keep an eye on your dough.
Final Words
Making bread at home is one of the most rewarding culinary skills you can learn. There is a specific joy in taking simple ingredients and transforming them into something golden and delicious. These soft cheesy dinner rolls are more than just a side dish; they are a way to bring extra care and comfort to your family table.
Whether you are pairing them with a Sunday roast or just eating them warm from the pan with a pat of butter, we hope this recipe becomes a new favorite in your home. Don’t be afraid to get your hands messy and enjoy the process. Happy baking!